If the temperatures in water in the winter are colder again, then you will read plenty of articles on the subject of “Argon“. Argon is often used by divers as a filler gas for the drysuit. In contrast to air, it has a greater density and (should) therefore better isolate the suit. However, this is being discussed extensively. Divers who dive with argon as the filling gas, swear by it!
At the latest, when you begin with technical diving, and the respiratory gases contain helium, you have to think about making a separate ventilation for the drysuit. Because it is undisputed that helium, which is used as a filler gas for the drysuit, cools down the diver very quickly!
Therefore, when you go diving with helium containing mixtures, small bottles are used, which only contain the gas for the drysuit. These bottle usually have a size of 0.7L or 1L. Bottles also come in 3L sizes for use with deeper dives.
In the following guide, I would like to show you how to secure such a bottle, which, within the diving community is known as the “Argon Bottle”, onto the back plate and what you should consider with the tube guide.
Step 1: The argon bottle holder and the special first stage
We can now obtain so called argon kits (including bottle, fastening straps and a special first stage) from any well-stocked dive shop. But, before you make the purchase, you should spare a few thoughts to the size of the bottle!
If you want to do deeper or longer diver, choose a larger bottle (3L). For shallower dives, a 0.75L or 1L bottle is sufficient. As a small guide: For technical dives in depths of max. 50m a 0.75L bottle is sufficient. Depending on the size of the bottles, they are secured to different equipment. The larger argon bottles are usually attached to the double tanks on the back. The smaller bottles can be fixed, with special straps, to the back plate.
Step 2: Attach the straps to the backplate
To begin you have to attach the straps onto the back plate. There are two methods:
- Both straps used.
- Only one strap used.
Both methods have advantages and disadvantages!
A normal argon set is always supplied with two mounting straps. If you use both straps, the argon bottle will sit securely on the back plate. However, it is possible that, in this case, the bottle may be too high. With this method, you can not reach the downward valve, nor the pressure gauge which is at the same height as the valve and the first stage – this is very cumbersome.
The second option ensures the argon bottle sits much lower and is easier to use, although this is attached with only one strap. Any bother when checking the pressure gauge is thereby prevented. Later I would like to present the second option, which is the one I dive with!
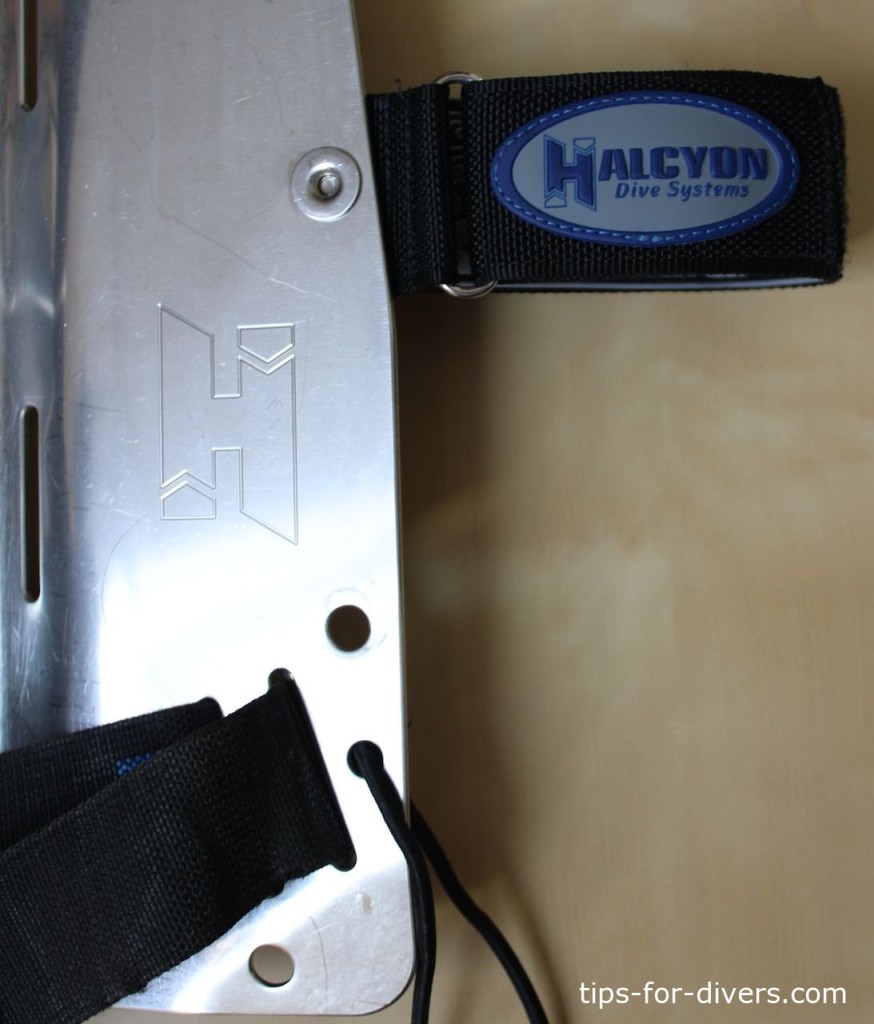
If you’ve chosen the solution with one strap, you will see a hole on the left side of the back plate (as seen from diver’s POV), that sits in the middle. The strap can be threaded through it in a loop.
Step 3: Fasten rubber loop
To avoid the argon bottle slipping down, it will be fastened with a rubber strap. For this, use the usual rubber line, for example, like the loops in the drysuit. From the end, cut a 20-25cm long piece! The length here depends on how low you want the argon bottle. Take the two ends of the rubber line and tie a knot. Then thread the strap through the lower hole on the left side of the back plate. Secure the loop on the other side of the hole to stop the knot from slipping out.
Step 4: Mount the argon bottle
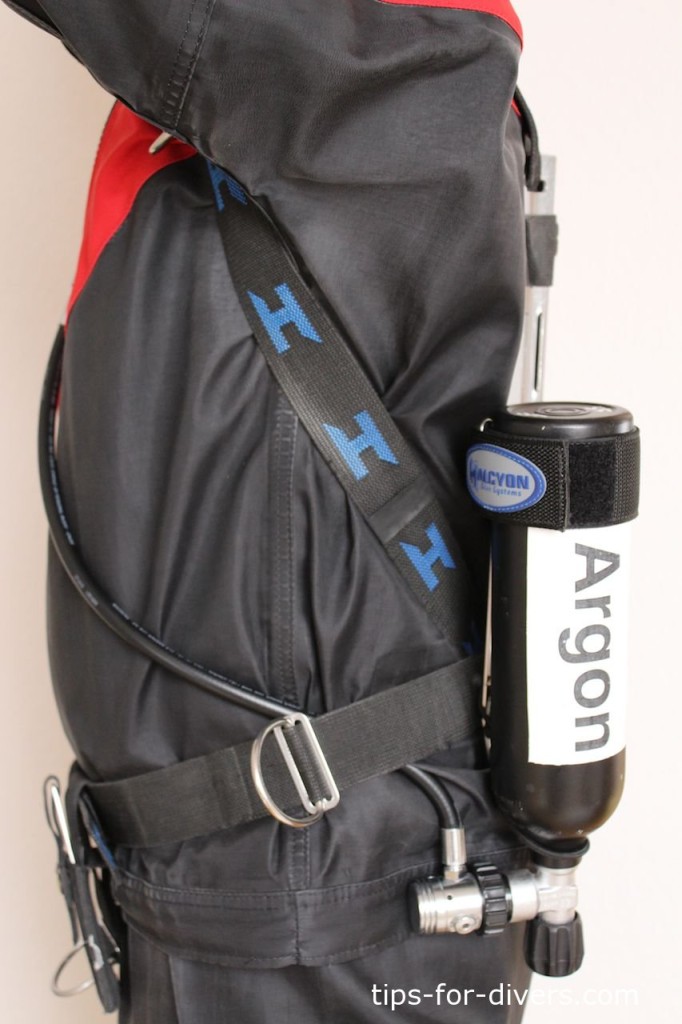
In the next step you can now mount the argon bottle. Open the velcro strap and insert the bottle. Thread the valve through the rubber loop at the bottom. Push the argon bottle as far down as possible. Close the safety strap and pull it tight, then close the velcro.
Step 5: Connecting the first stage
When the argon tank is securely attached, you can screw on the first stage. If you have got an argon set, then you will no doubt have recieved a special first stage. These special first stages are NOT needed for breathing, but are only intended for filling the drysuit. The advantage of this special first stage is that they are not made as complex as first stages for regulators. You will notice that the flow rate here is significantly lower then with a normal first stage.
Important! Make sure when purchasing, that the first stage argon bottle has a relief valve. This can either be integrated over a low pressure connection or it can be directly installed at this stage!
Hose routing
With the hose routing, there are a few points to be aware of!
- The inflator for the drysuit should not interfere with the long hose!
- The valve of the argon bottle must not obstruct your clipping of the pressure gauge.
Optimally, the drysuit inflator hose should run from the argon bottle under your waist strap, then to the inlet knob of the drysuit. This ensures that the inflator is fixed and will not bother you.
On the first dive with the new argon bottle, it is advisable to try clipping with the SPG. If this is not possible without complications, you should change the position of the argon bottle. You can also ask your dive partner to look at your configuration from the side while underwater, as he/she can more easily see if there could be any problems caused by the pressure gauge or inflator.
It is also important on the first dive to try and see if you can easily open and close the valve of the argon bottle while underwater.


