Today I am very happy to present the very first guest post here on Tips for Divers! Simon wants to tell you a little bit about spools for divers. In this post he will show you a way on how you can attach cave line to the spool.
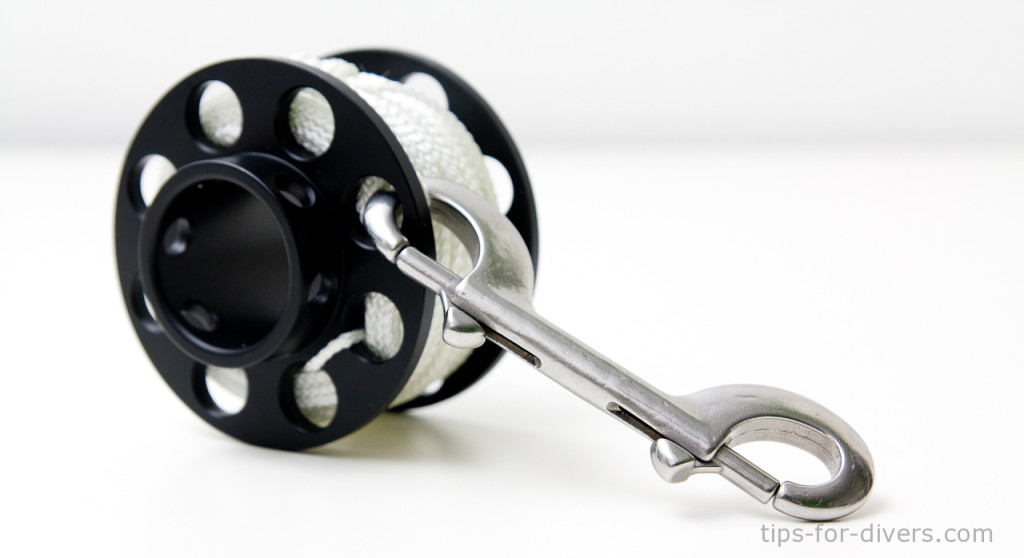
The spool is an indispensable piece of diving equipment, which can be used for many purposes. Primarily spools are used for navigational aid and setting a surface marker buoy. There are a few tricks and tips on how to prepare the finger spool properly.
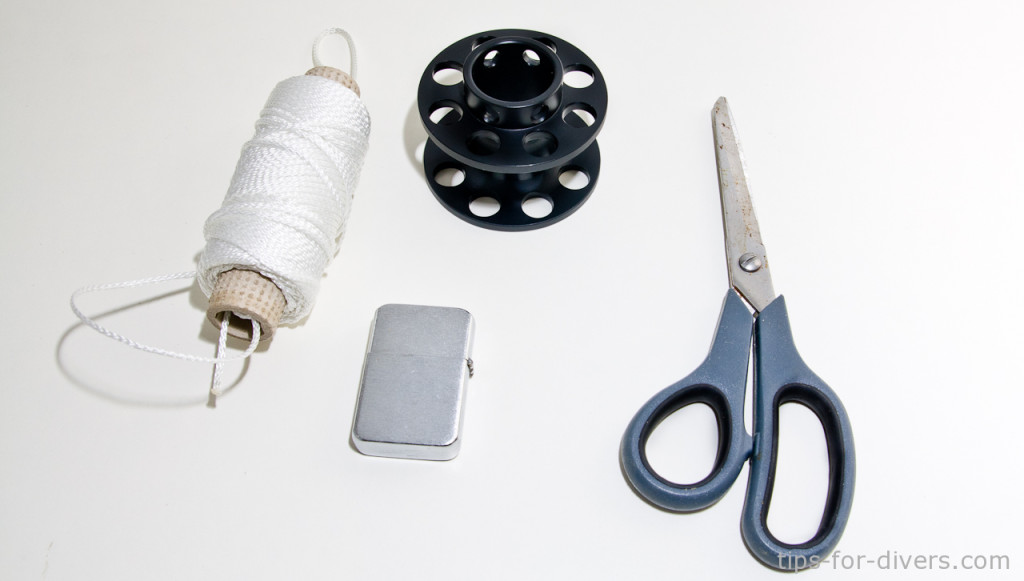
All you need is a spool body, the desired amount of cave line (nylon line), a lighter and a pair of scissors.
Step 1: Mounting the line on the spool body
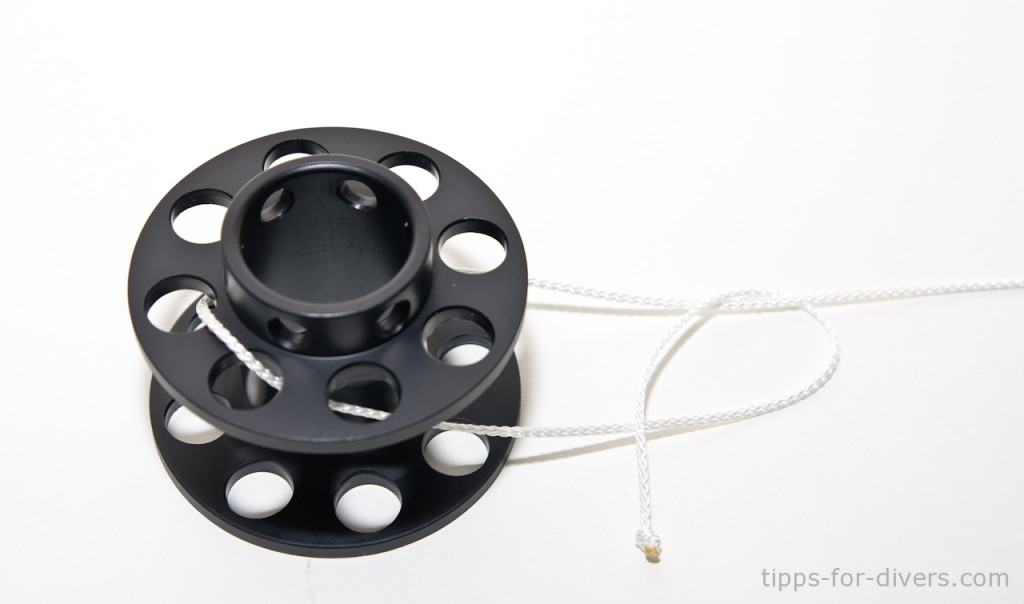
When it is used in the depths, it pays to have the string attached to the body. Do an overhand knot as a stopper on one end of the caveline. The overlooked end should be burned with a lighter.
Thereafter, thread the line around the spool and through two of the holes to fix it. It is now possible to wind the string up from a completely unrolled finger spool, which usually is not feasible due to lack of friction.
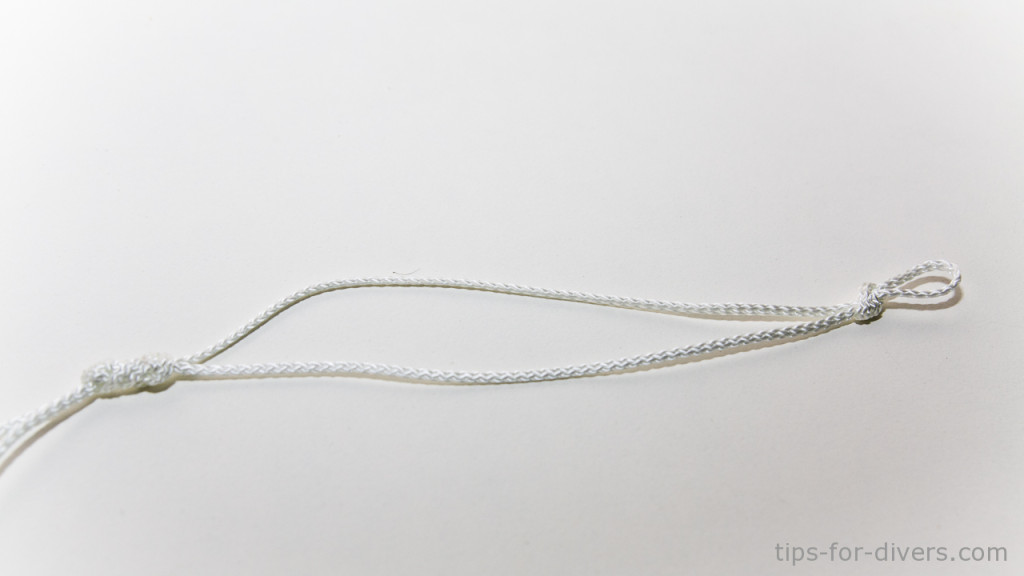
Then the free end is attached with an Arbor knot, as shown in the pictures. The loop becomes tight under load and the cord is thus firmly connected to the spool.
This method protects the Caveline against external influences, which make fraying possible. However, this is not very problematic in my opinion, because you can check the status of the Caveline visually.
Furthermore, the Halcyon cold water spool, is constructed so that the cord is protected. It is possible to create a second loop redundancy. The ability to roll up the spool is certainly helpful and outweighs the disadvantages incurred which are not even present in a double loop.
When rolling up, it is important to rotate the core and thus wind the cord in, and not wrap the cord with your hand, as the cave line can twist and this may create problems when unrolling. A new spool is usually much too tightly packed with too much cord, so you should cut four or five metres, to roll up the double ender without trouble.
Step 2: Loop at the end of the cord
At the end of the cord you should create a loop to attach the spool to the buoy or a double-ender. In some tutorials, the Bowline knot is proposed, which, however, is not suitable because the knot can become tightened under pressure with a wet rope. Here a nine sleeper has been proved. Given this, initially put the cord in the form of a long loop, forming an eight. After this, the loop is wrapped around the standing end again (hence the name “Nine”) and pulled tightly through the first loop. The exposed end is, as always cut and burned, thus creating a secure and firm knot.
At the top you can now put a small sack, so a simple overhand knot forms a loop. When the slightly shifted ends pull against each other, this keeps the large loop open automatically and allows the spools to pass through.
Step 3: Knots in the cord
As a backup depth gauge, it is worthwhile to make a mark at three, six and nine metres. Of course, you can add endless more marks if you want, but I think that these depths are the most important. You can feel these, even with gloves or see them without glasses. Make the mark with permanent marker so the knot can be found and placed and won’t come off. But you shouldn’t lay it on so thickly, that it affects the stability of the string and stops smooth rolling. The simple overhand is thus ruled out, so the figure-of-eight knot is the appropriate method of choice here. For the knots, create a loop, run the cord around the standing end and then put the free end through the first loop.
One knot at three metres, two knots at six metres and three knots at nine metres, is a proven system that can be extended as needed.
Thank you Simon, for this great first guest post on Tips for Divers!
If you want to hand in a guest post as well please get in contact with me! All topics are welcome. If you need help with text or pictures just drop me a message. I am looking forward to future guest posts!


